niHP
Welcome to ni Home Page!
I am a happy user of awesome, an highly configurable window manager. I wrote a icon generator so that I can populate my wibox with icons of the exact right size.
Those icons are inspired by anrxc's 11x11 icons. You can even use the script to generate those original icons.
Here is an example output (last line is anrxc's icons generated by the script):
![]()
You can get the script from my awesome config git repository
X11 font naming was quite obscure to me until I finally decided to look for some explanations.
Let's throw some light on X11 fonts.
On today X11 servers, there are actually two different font systems:
- Original core protocol: fonts are stored on the X11 server and clients send text through the X11 connection.
- XFT library: fonts are stored on client side, the client sends drawing primitives to the server.
See also this Guide to X11 Fonts.
Original core protocol
If you ever played with X resources, you probably have seen font names like:
-misc-fixed-medium-r-normal--20-200-75-75-c-100-iso10646-1
This is the complete name of a specific monospaced font. You can use
xfontsel to compose such a name and use it in your urxvt configuration for
example.
Those names are listed in fonts.dir files, have a look at
/usr/share/fonts/X11/misc on a Debian system.
However, more human friendly names are also defined, look at fonts.alias
files, you will see names like 10x20 which can remind you of the default
XTerm configuration.
Using the original core protocol, only X11 compatible fonts are usable, no TTF!
Seen here.
XFT library
The XFT library allows more flexible font manipulation because everything is done on the client side. It also adds support for more font formats like TTF. However, according to rxvt-unicode FAQ, it is slower than core protocol.
Font names are using the following format:
<family>-<size>:<name>=<value>...
Where size is the font size in point, and name/value pairs define other properties. Look at Keith Packard's Xft Tutorial.
One useful example if points are not meaningful for you:
times:pixelsize=100
By the way, the modern point is a 72th of an inch, and it is converted to
pixel size based on the resolution of your monitor (see xdpyinfo | grep
resolution).
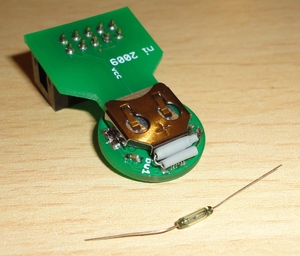
One of the tricky problem with the binary watch project was to find a way to connect a watch button to the circuit. I reserved two pads on the PCB to connect this button, but without any precise plan on how to do it.
Finally, a much simpler solution is to use a reed switch instead of the button. The watch is then operated using a magnet!
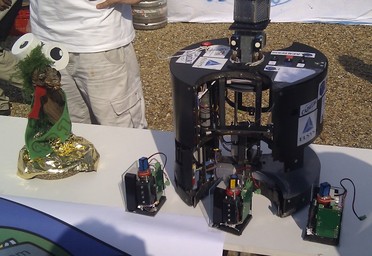
As a member of APBTeam, I took part in the Eurobot competition. We finished at the 5th place out of 172 participants and we received the Jury Prize!
This is a position control test I made for the Mindboards forum:
Download video.
It uses the work in progress position control algorithm implemented for NXT Improved Firmware and a really simple NXC program:
void
PositionRotatePID (long angle, byte kp, byte ki, byte kd)
{
    SetOutput (OUT_A,
               OutputMode, OUT_MODE_MOTORON + OUT_MODE_BRAKE + OUT_MODE_REGULATED,
               RegMode, 4,
               RunState, OUT_RUNSTATE_RUNNING,
               Power, 50,
               TurnRatio, 0,
               TachoLimit, angle,
               RegPValue, kp, RegIValue, ki, RegDValue, kd,
               UpdateFlags, UF_UPDATE_TACHO_LIMIT + UF_UPDATE_SPEED + UF_UPDATE_MODE + UF_UPDATE_PID_VALUES);
}

inline void
PositionRotate (long angle)
{
    PositionRotatePID (angle, 96, 0, 32);
}

task main ()
{
    /* Turn to 90 degree. */
    PositionRotate(90);
    Wait (1500);
    /* Go back to 0. */
    PositionRotate(0);
    Wait (1500);
    /* Turn to 90 degree again. */
    PositionRotate(90);
    Wait (1500);
    /* Now follow motor B. */
    while (1)
      {
        PositionRotate(MotorTachoCount (OUT_B));
        Wait (1);
      }
}
I played with NXT regulation methods and I found that the default regulation time is quite long, more details: regulation time.
Since LEGO released NXT firmware source code, there is almost no community around the original firmware. I would like to make this change and I managed to successfully compile the firmware using GCC.
I started NXT Improved Firmware. It aims at providing easy ways to start digging in the firmware, and to exchange modifications.
See you there!
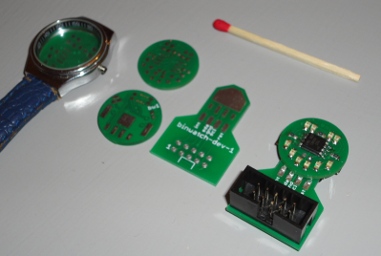
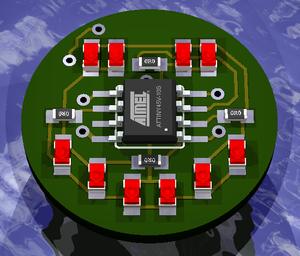
I am working on a tiny binary wristwatch. It is based on a 8 pins AVR, an RTC (to save power) and of course LEDs!
The main feature of this watch is its size as it is supposed to fit in a women wristwatch. This brings some interesting problems to be solved:
- there is no room for a big battery, so it has to draw a few micro amperes,
- there is only 8 pins on the microcontroller, but 10 LEDs to control.
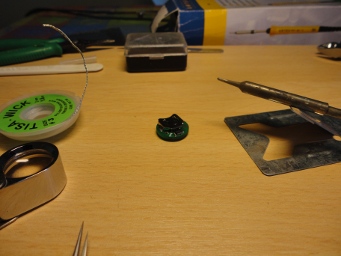
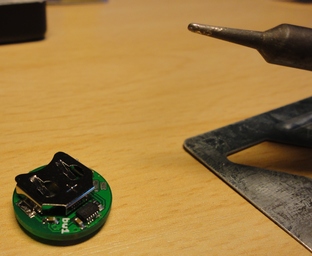
Here is how it looks like:
More posts to come with details.
